How to Add/Install M3U IPTV List to e.g. MAG250 Box or any other Mag device!
This is particularly interesting because you don't have to tie it to a fixed Mac address
so you've more freedom to use the playlist on more devices, however as usual not at the same time!
1. Put the m3u list on USB
2. Go to the main menu of MAG250
3. Insert USB
4. Go to ''Home Media''
5. Find USB
6. Press OK on USB
7. Locate M3U File
8. Press OK on ''m3u list'' to open it
9. Now you see your TV channel names
10. Press menu (≡)
11. Choose Select all
12. Press menu again
13. Press copy
14. Press TV (it’s on your remote)
15. Now you go to IPTV channels list
16. Press menu
17. Press paste
18. After that Press EXIT (1 or 2 times but don’t hurry)
19. It will ask to Save this
20. Press OK to save
IPTV is completely secure, as it is merely a service that allows you to view your favorite cable channels over the internet without purchasing a cable connection.
Despite the fact that we do not engage in any form of piracy on this site and that all of the channels we provide are licensed and safe to stream, it is important to note that we do not supply any channels that are illegal.
VLC is the most common application for streaming live TV on computers and in this guide, we will show you how to setup IPTV channels via VLC on your computer.
Step 1: Download and install VLC media player. When the application is open, press “Media”
Step 2: Click on “Open network stream”.
Step 3: Enter your M3U URL and press Enter.
Step 4: Now your playlist is loaded, press the combination between CTRL+L to bring up the playlist.
Now you can choose or search for your desired channel and start watching Live TV.
You cannot install TiviMate IPTV from the Amazon store because, according to Amazon, TiviMate is a third-party app, but there is nothing to worry about as there is another way around it: Follow these steps.

- Select “Find” from the homepage of your FireStick.
- Click Search and type Downloader. Then select the Downloader option in the recommended search below the virtual keyboard under the typing field.
- Select Downloader in the search results list.
- To install the application, select Get or Download.
- Open the FireStick home screen after the Downloader has been installed. Choose Settings.
- Choose My Fire TV from the list of alternatives.
- Choose Developer Options. By default, it is switched off, but you can switch it on by scrolling to and selecting “Apps from Unknown Sources.”
- The permission for Downloader would be disabled on the following screen. Click on Downloader to turn it on.
Once you have downloaded the downloader app and are allowed access to install apps from unknown sources, then you can easily install the TiviMate IPTV app.
IPTV APK URL:
Use this URL to download the APK for TiviMate IPTV: https://tivimates.com/tiviapk
Now do the following steps:
- Open the Downloader.
- Go to the Downloader’s home screen and click the “Enter a URL” field.
- Type https://tivimates.com/tiviapk and click GO.
- After TiviMate IPTV has been downloaded to your FireStick, an installation option will appear on the screen. Press Install.
- Upon complete installation of the application, a confirmation message will appear. Return to the Downloader app by clicking DONE.
Now that the TiviMate app has been installed on your FireStick device, you can enjoy any content, such as movies, TV shows, or sports, you want.
1- Download and install DCC or Putty
2- Open DCC or Putt
3- Typing host name : local ip address for box
4- Connection type setting : Telnet
5- Enter
6- Username and password entered ( user and pass : root )
7- Copy the command, m3u line we send you by email: wget -O /etc/enigma2/iptv.sh “http://ourdns:port/get.php?username=XXX&password=XXX&type=enigma22_script&output=mpegts” && chmod 777 /etc/enigma2/iptv.sh && /etc/enigma2/iptv.sh
8- Paste it in DCC or Putty ssh
9- Enter / Wait for it to be installed
10- Restart the receiver
11- Go to your box “Favorites” and you should have a new bouquet.
To stream IPTV on your Roku device, first download the Roku App: 1. Roku App Side Load:
-You must side load it onto your device:
– DOWNLOAD ROKU APP
Next you’ll need to set up your m3u playlist to be able to view your channels:
M3u Playlist Setup Step 1:
Start by downloading the M3U playlist player from the Roku online store.
Step 2:
Now click on Add New or Updated Playlist.
Step 3:
Enter your M3U URL [LINK] and click on Save Your Playlist.
Step 4:
Depending on your M3U playlist, it might take a couple of minutes before your playlist gets fully loaded. Now your M3U playlist is fully loaded and you can start watching TV by selecting any channel.
In this modern age where everything is interconnected privacy of a person is above everything else, and to protect your privacy, you should always take measures in your own hands. Your privacy can be invaded by your own government.
Furthermore, there is also the problem of censorship and geo-restrictions. To avoid all these problems, the best solution is to get your hands on a strong and reliable VPN such as ExpressVPN.
Whenever we download an app from a reputable source, we trust them with our identity and security, but there are a lot of third-party apps running in the background. All these third-party apps potentially cost a lot of risks to our privacy and security.
In the modern world, privacy is an important part of our identity, and we should take every step to protect it. A VPN can help us in protecting our information and privacy.
In several countries or geographic regions, a certain type of content is not allowed, and there is no way to view it. This is due to the geo-restrictions imposed by the governments in these countries.
Furthermore, another problem arises when certain TV shows and movies may run into licensing issues in certain countries and thus cannot be viewed in a country. A VPN eventually ensures that you get the best security to download third-party applications.
IPTV Smarters and IPTV Smarters Pro is a free default IPTV Player application for both iOS and Android devices. The company WHMCSSmarters has started its services in 2018 dedicated to IPTV (Internet Protocol TV) services and Xtream-Codes. They’re offering premium services for IPTV like auto payments for IPTV on the website, rebuilt of their APK (rebranding), IPTV website, Web TV and many other services with great prices.
Nowadays their default IPTV application IPTV Smarters and IPTV Smarters Pro which is available free for Windows, Android and iOS is most popular IPTV Smarters Reviews from users. The application supports all new features every IPTV user need including EPG, Groups/Categorized channels, channels logos, channel favorites, hiding/locking and many more. The application is actually very easy to use but many users don’t know how to setup IPTV Smarters App and settings. So we are here with step by step tutorial of IPTV Smarters Pro App.
IPTV Smarter Pro Features:
- Auto-Updating Channels/Movies/Series from source
- No need to log in every time and no ads.
- Support for channels by groups/categories/countries.
- EPG (electronic program guide) support, EPG timeshift (auto-update)
- Catchup (Streams recording)
- Favorite, Parental Control
- Account information (expiry, creation and more)
IPTV Smarters & IPTV Smarters Pro Setup (Step by Step):
Step 1:
Install and open the software on your device. You can download IPTV Smarters Pro latest APK from PlayStore | iOS Store
Step 2:
Open the App and there you need to accept their terms of use for the first time.
Step 3:
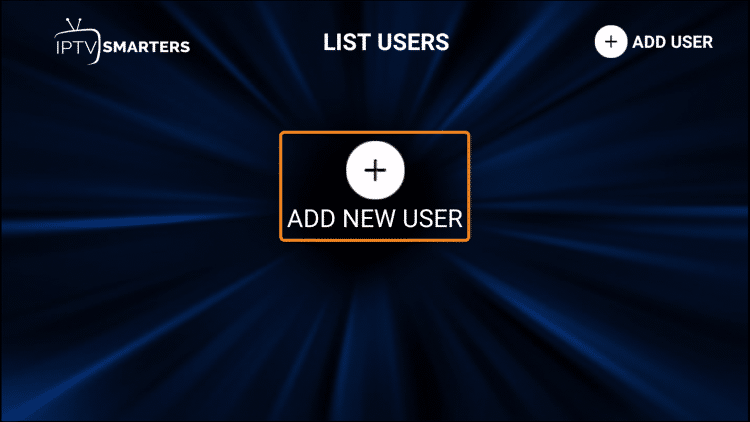
As the TOU is accepted it will ask you to ADD NEW USER
Step 4 via File/URL:
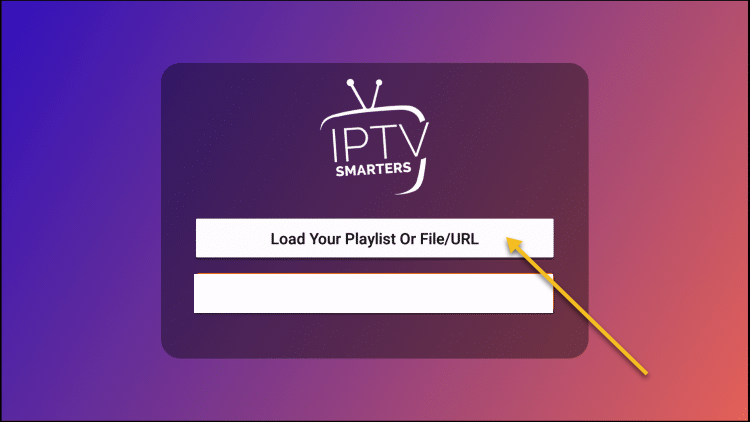
There are 2 ways of adding a profile/user of IPTV. 1 Login with Xtream Codes API and second Load your Playlist or File/URL.
For File/URL click on the first option and add the long URL of m3u or select downloaded m3u file and use any Name. Now click on Add User.
To login, via API we need to use m3u link login. here is the way of using data. An m3u link will look like this; http://example.com:8000/get .php?username=test12&password=test23&type=m3u .
You can apply for a playlist here.
The login is inside this link. The usable links are marked in colors like http://url_here.com:port | username | password.
Step 5:
Now you’re logged in and a profile has been created like this:
Step 6:
Click on profile (long press if not working). You will see 3 options Login | Edit | Delete. Go for Login.
Step 8:
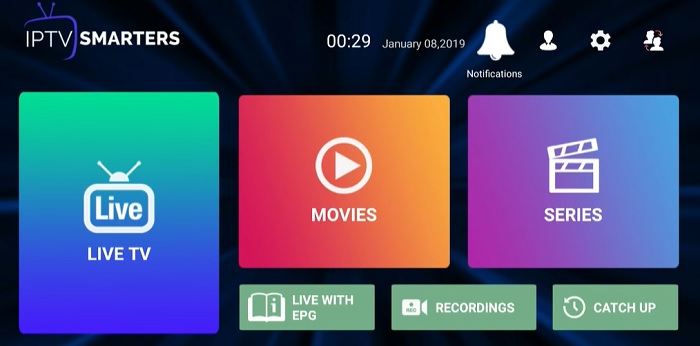
We’re successfully logged in and now are on the dashboard. There you can see many options like LIVE TV, MOVIES, SERIES, INSTALL EPG, RECORDINGS, CATCHUP and 4 icons above of users, settings, account info and notifications. You can simply click on Live TV and enjoy services.
More Features and Guide:
Series:
Click on SERIES from the dashboard and you’ll get the list of series available there and watch it.
Install EPG:
Clicking on Install EPG available on the dashboard will start loading EPG automatically. Just click on this and nothing to do here anymore.
Recordings:
Long pressing on the channel shows us an option of Start Recording, while you’re watching a program you can record it and can watch it later when you want. You need to select the offline folder where you wanna save the recordings.
Catchup:
Catchup is another best recording feature provided by your IPTV service provider. This keeps the file stored on the server not offline. The is best than recordings above because you don’t need to worry about the storage here.
Account Info:
The second icon after notification bell on the dashboard, clicking on this show you the information about your subscription including expiry date, trial info, the limit of connections, creation date and more:
Notifications:
When you’re using their app for a long time, when they add a new feature you can see that in notifications like this:
LIVE TV:
Clicking on LIVE TV will show you categories country wise.
Clicking on a category will open the available channels list, will load icons (if available).
You can press tab button and get quick access to few great features including updating EPG and List.
Long press channel name and will see options like recording and favorites.
Settings:
There are many setting options lets cover 1 by one.
General Settings:
There you can setup AutoStart on bootup, Show Full EPG, Active Subtitles, Set user agent and change language. By default settings are correct. If you want to change you can do it here.
EPG Time Shift:
By default, it's 0 you can change it to any number and save it.
Stream Format:
Its select default, you can save it as MPEGTS (.ts format) or HLS (.m3u8) format. Most commonly used in MPEGTS.
Time Format:
By default its 24 hours, you can change it to 12 hours and save it.
EPG Timeline:
The default selected is Show All channels, but I'll recommend going to Show Channels only with EPG. So if there is no EPG with any channel it will nothing show up there, otherwise, a default message will keep showing there.
Automation:
Keep both options checked as they are check by default already. If wanna change you can uncheck here.
Set Parental Password:
This the security feature, if you’ve kids at home and there adult channels in the list, you can lock them and the password only you know. So, when kids are gonna click on this channel it will ask for a password to stream it.
Player Selection:
The default setting will be Built-in Player, but you can change it if you’ve already selected a player by clicking on ADD PLAYER button (learn in next steps).
When you’ll click on ADD PLAYER, it will show you available players.
Click on the player you want and it will confirm adding. Click on Add
Now back to Player selection, clicking on the built-in player will show you another player you just selected and can save it. Next, when you’ll play selected media it will autoplay in your selected player.
Player Settings:
There are more settings for your player, I will suggest keeping default settings
External Players:
You will see now all external players if you’ve already added, to remove them click on the player name or long-press on the name and it will show an option remove. Click and remove it if you want to remove.
Checking for Updates:
Click on it and it will update it if an update is available.
Finally IPTV Smarters Pro is ready!
This IPTV Smarters Pro settings can be applied on Android TV Box, Firestick, and other popular supported operating systems.
I hope it helped you a lot.
This is an application that can replace Set Top Box for our service.
No extra hardware required! All you need is a supported network-enabled Smart TV. You can use the application just like you would the Set Top Box using your TV’s remote and retain all features that are offered by your provider. For example timeshift, video on demand, interactive TV and so on.
Download from your’s TV market application named Smart STB
Smart-STB application (an emulator of “Mag 250” set-top box) for Smart TV
Price and other information please check TV Team Pricing
1) Enter the app store on your TV.
2) Select the “Search” line and press the input on the remote control.
3) In the search bar, enter “Smart STB” and click “OK”.
4) As a result of the search, select the Smart STB application and press the input on the remote control.
5) The application installation menu opens.
6) When the installation is complete, a message will appear indicating that the installation is complete
Supported systems:
1. Samsung (Tizen) 2. Samsung (Smart TV) 3. LG (Webos) 4. Android (TV, no pen)
Application activation (purchase)
1. Just provide your Virtual MAC address to us
2. In order to get your Virtual MAC address, just go to this link: Smart-STB Virtual MAC Address Guide
2. Wait for confirmation from the support team.
Launching the application for viewing.
1) Run application.
2) “Loading portal …” appears on the screen. Press the “Menu” or “OK” (“Enter”) button on the remote control.
3) In opened settings menu select “System settings”.
4) In the “System settings” go-to “Portal”.
5) In the “Portal” settings, specify the name in the “Portal 1 name” field (you can enter any name) and the portal address in the “Portal 1 URL” field. The address of the portal should be entered (ask us for portal)
6) Exit the “Portal” and select “Restart”.
7) “Loading Portal” and the download bar will appear alternately on the screen.
8) A window for entering login and password will open. Enter your details and click “OK” on the TV screen.
9) The TV viewing menu opens.
Setting up viewing TV channels
Select the channel you want to configure. Open the channel for viewing in full-screen mode and press the “Tools” button on the remote.
The channel setup menu opens, showing the following settings:
“Audio” – select the audio track;
“Subtitles” – settings of the subtitles on the TV screen;
“3D mode” – a selection of 3D mode (if available);
“Complaints” – here you can choose the following options: to sound, to the image, to the lack of a program guide and to the discrepancy of the program guide;
“Clock” – enable or disable, as well as the location of the clock display.
This guide will show you How to Install IPTV Smarters on Firestick.
IPTV Smarters is an IPTV Player that works on just about every device imaginable.
One of the main reasons this app has gained so much popularity is because it is compatible with iOS and Android Mobile devices. That means you can stream live television wherever you are!
The tutorial below will show you how to install IPTV Smarters on a Firestick.
The first one will show you how to install this app on an Amazon Fire TV Stick 4k. To do so, we must side-load this application because it isn't available inside the Amazon App Store.
If you're running an Android TV Box or Mobile device, this app is available in the Google Play Store:
IPTV Smarters – Google Play
The second method will provide installation and setup instructions for IPTV Smarters on an iPhone XS. Users can install this via the Apple App Store:
IPTV Smarters – Apple App Store
How to Install IPTV Smarters on Firestick/Fire TV
Your IPTV service will provide you with the proper login credentials, which usually consists of an M3U URL.
If you need an IPTV service, check out the link below.
The Best IPTV Service. <-------
1. From the Main Menu scroll to hover over Settings.
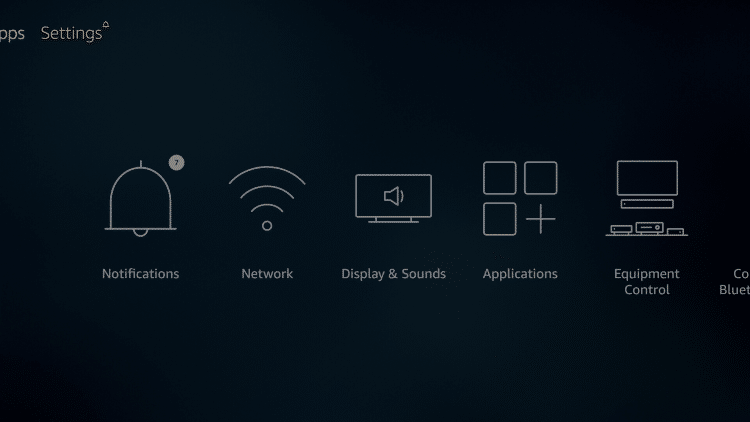
2. Click My Fire TV.
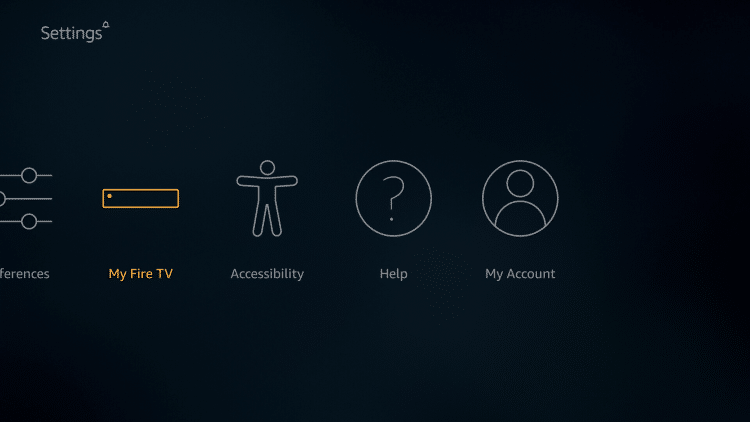
3. Choose Developer Options.
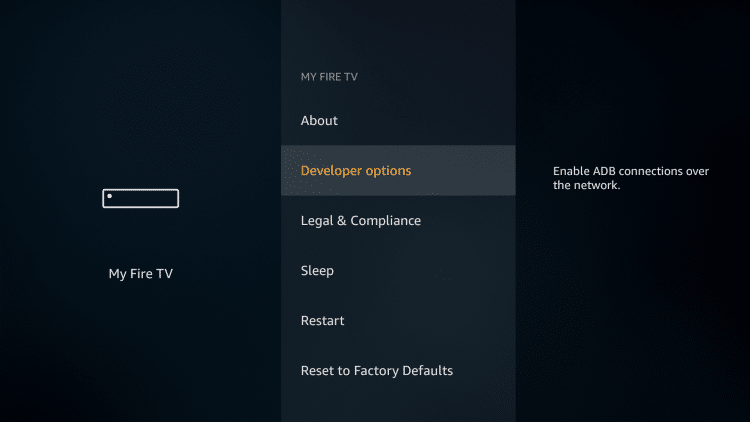
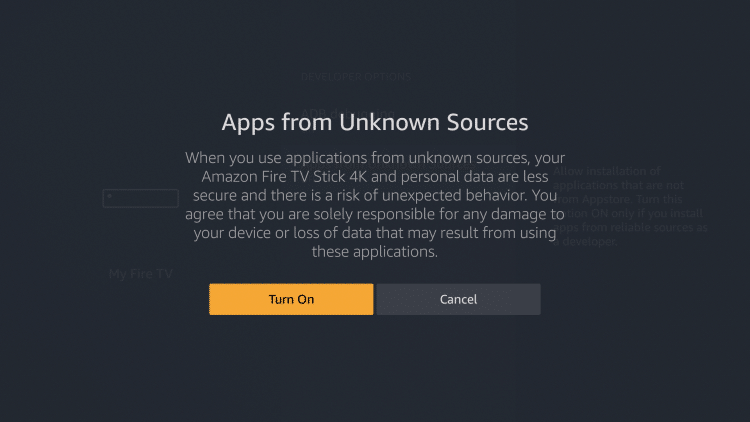
4. Click Apps from Unknown Sources.
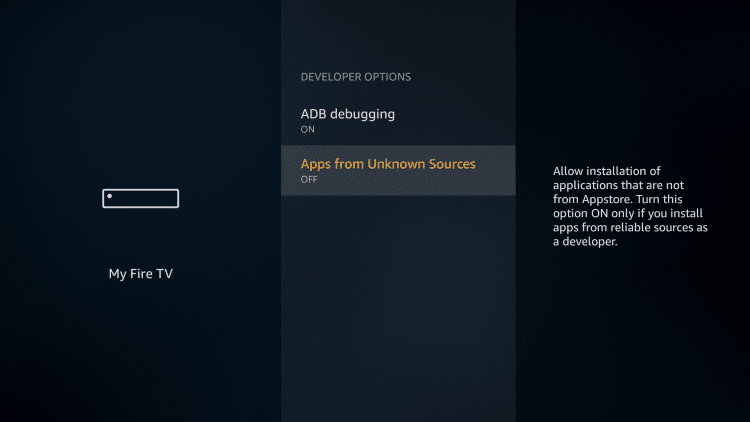
5. Choose Turn On.
6. Return to the home screen and hover over the Search icon.
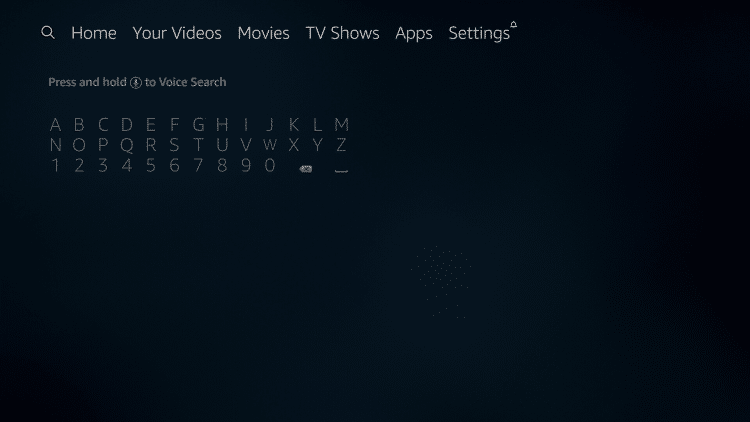
7. Type in Downloader.
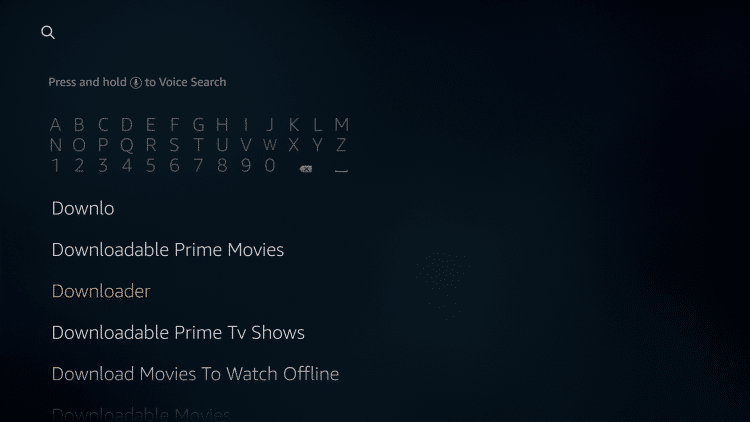
8. Select the Downloader app.
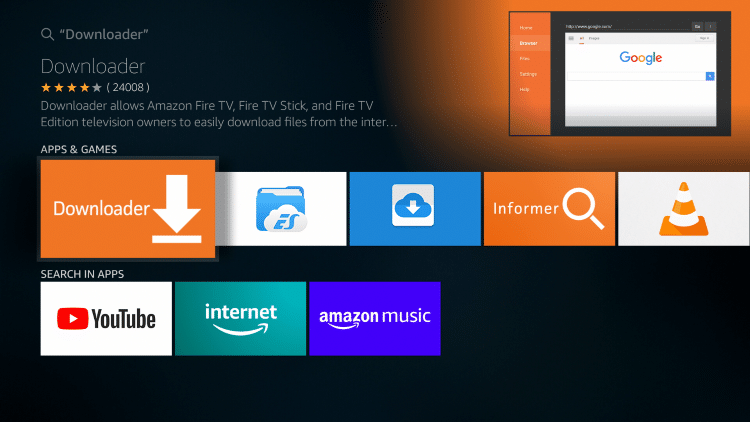
9. Click Download.
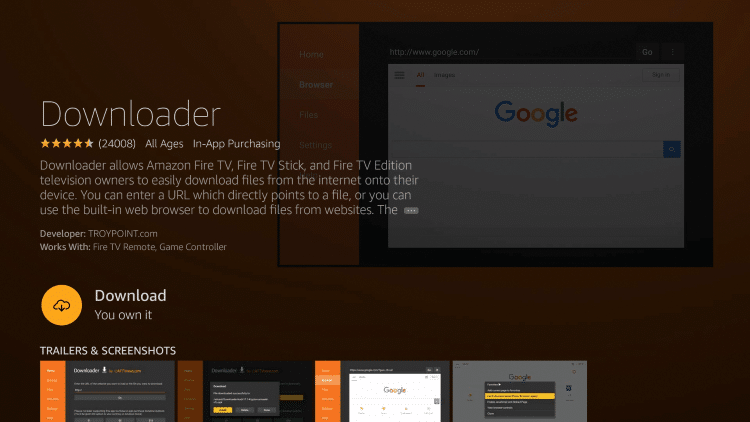
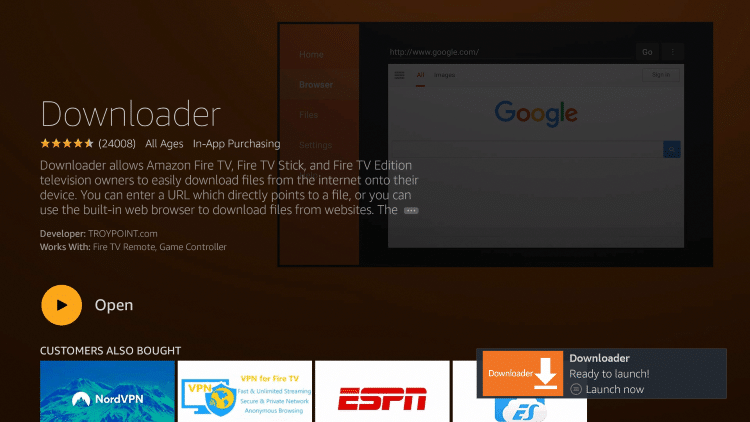
10. Click Open.
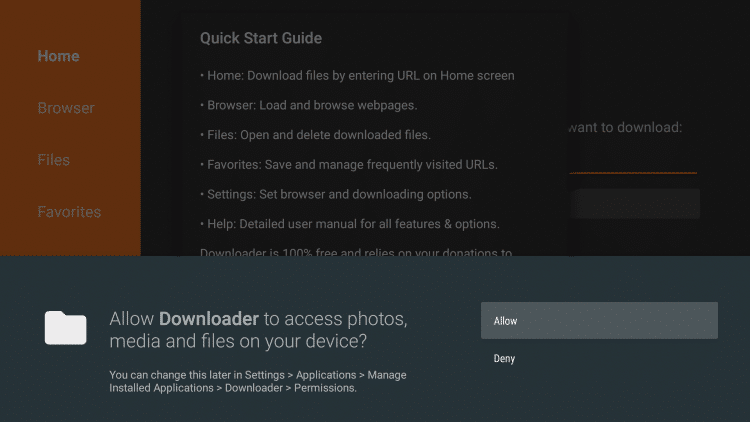
11. Select Allow if presented with this prompt.
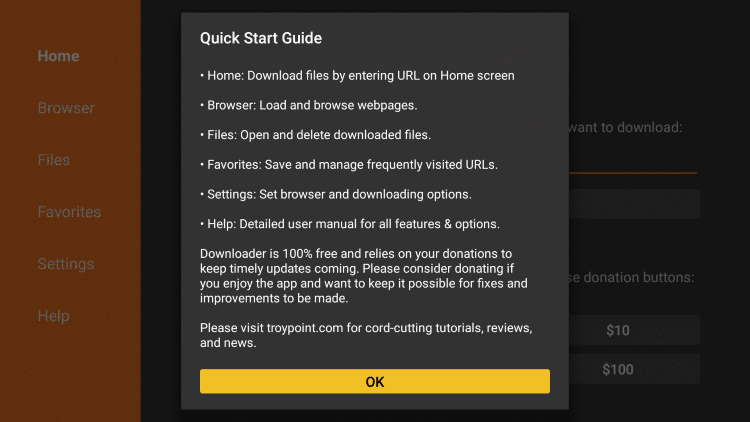
12. Click OK.
13. Type the following URL exactly as shown here: https://bit.ly/smarters-tvteam
and click Go.
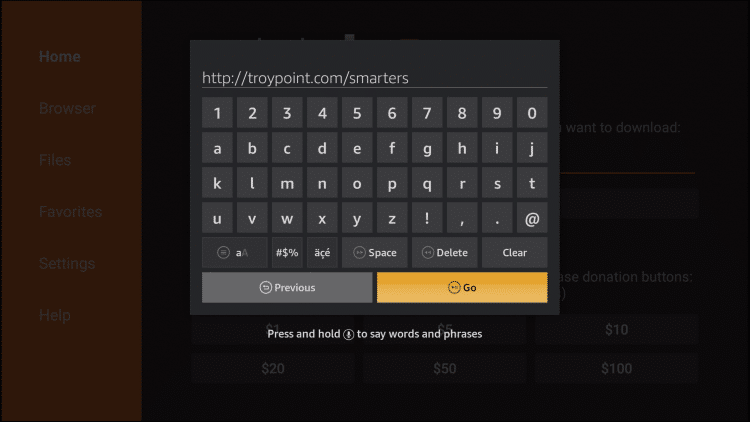
14. Wait for the file to download.
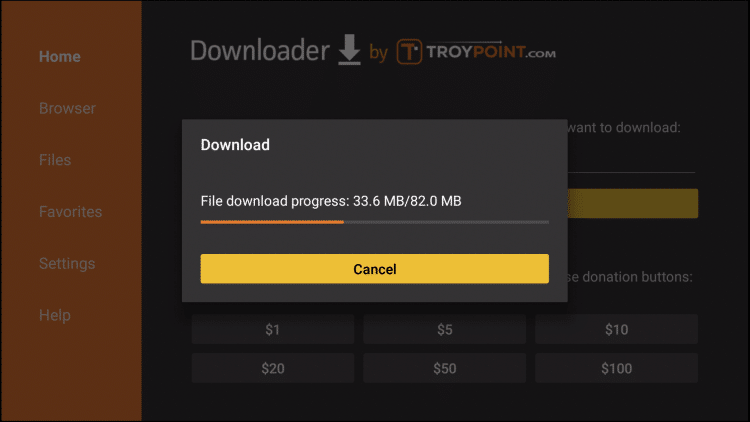
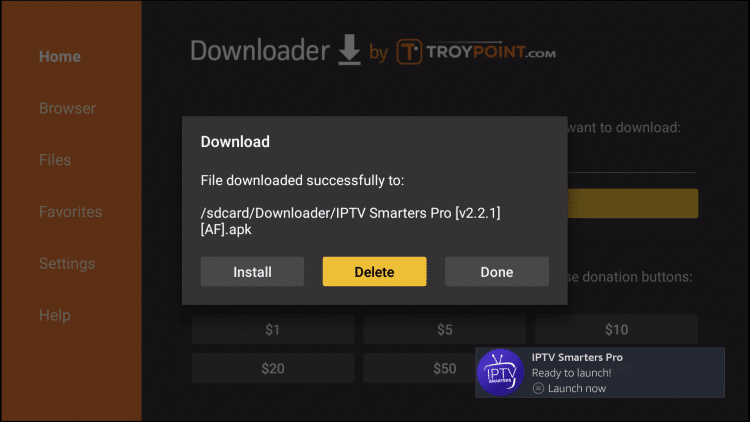
15. Click Install.
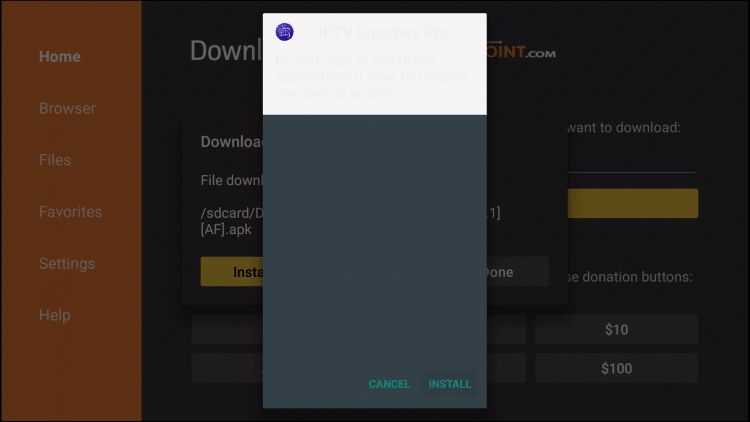
16. Click Done.
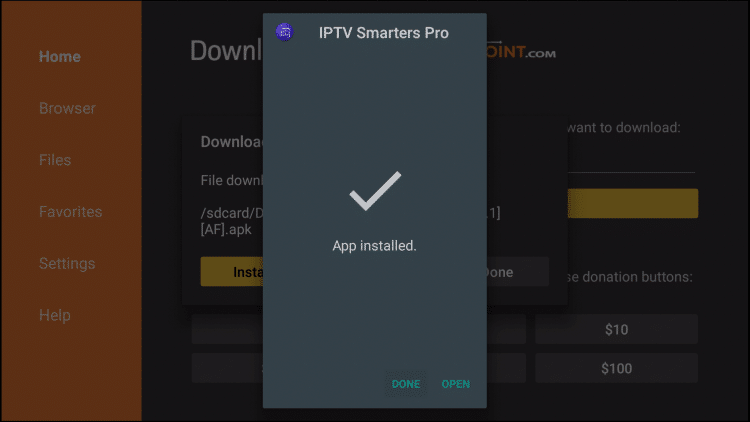
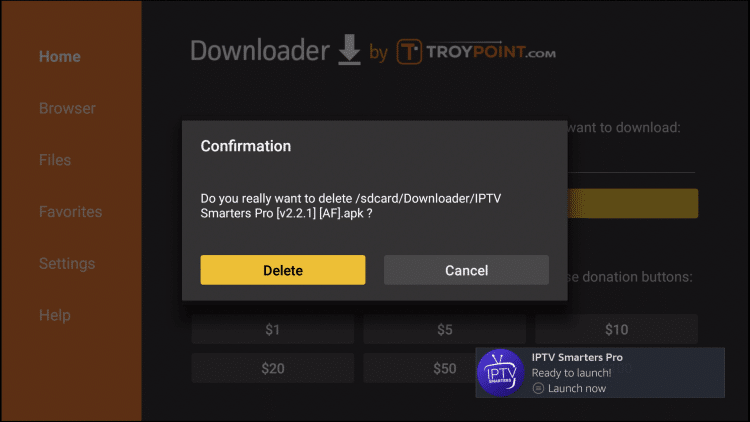
17. there you'll go back to the Downloader. Click Delete.
18. Click Delete again.
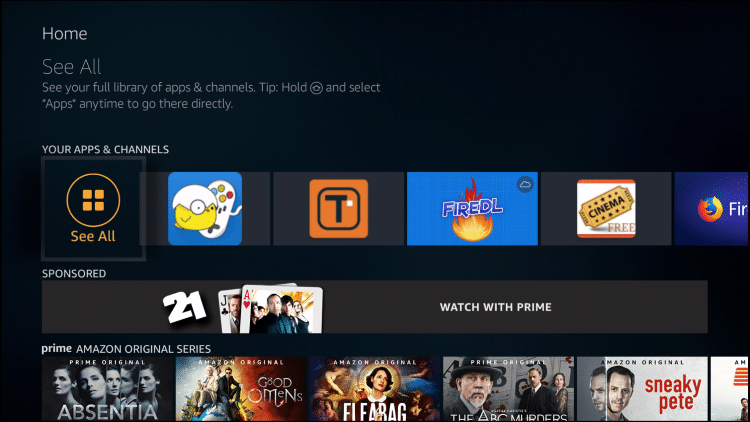
19. Return to device home-screen and under "Your Apps & Channels" click See All.
20. Scroll down to hover over IPTV Smarters.
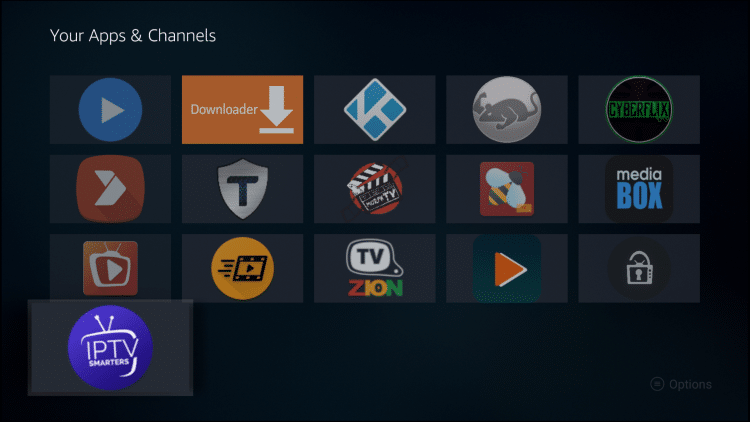
21. Click the Menu button on remote (3 horizontal lines), then click Move to Front.
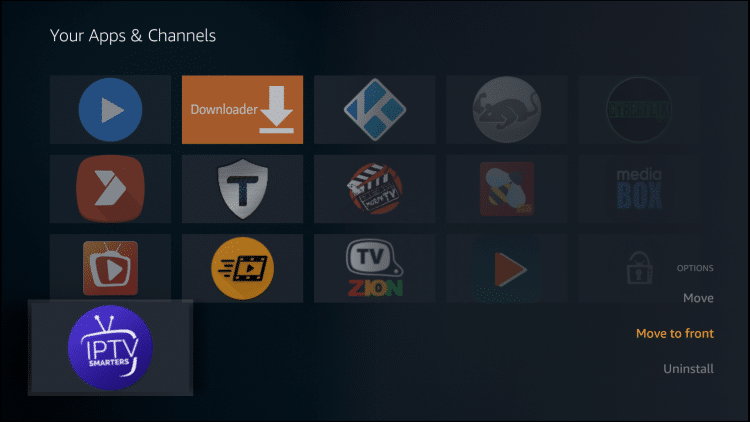
App installation is now complete!
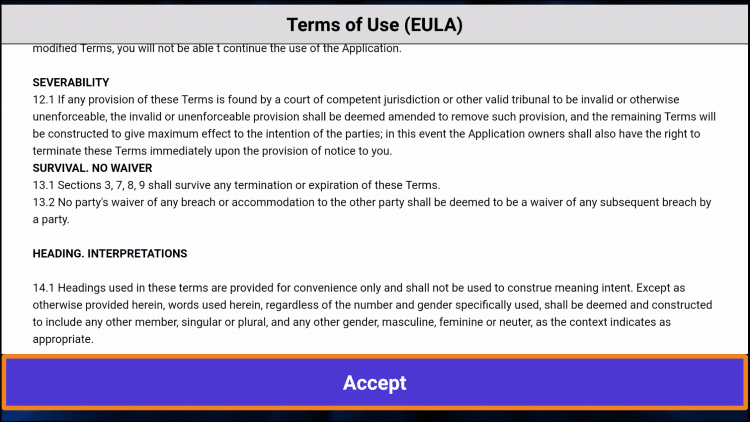
After opening, you will see the "Terms of Use" agreement.
Click Accept
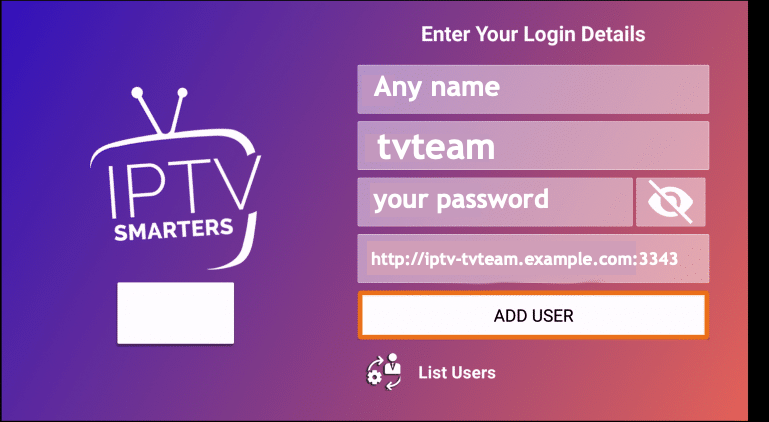
Click Add New User
use an M3U playlist URL and choose to Load Your Playlist or File URL
Most M3U URLs require that you input your service username and password.
You will usually see where these go inside the URL as it is indicated by "username=xxxx" & password=xxxx".
You will need to input your username and password where the x's are located.
Here is an example of an M3U URL. This is not a real M3U URL, but this is how the structure typically looks.
The parts highlighted in dark black is what you'll need on Smarters!!
The real credentials you'll get from us after you've subscribed to our service.
http://liveiptvservice.org:86/get.php?username=xxxx&password=xxxx&type=m3u_plus&output=ts
Enter account information and click Add User
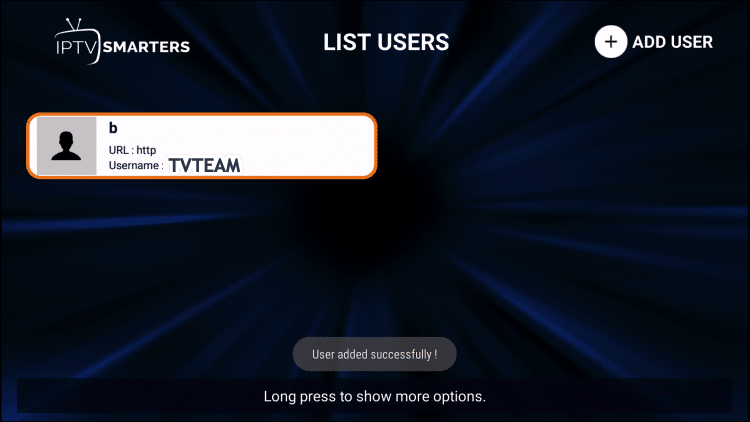
Wait for User added successfully message to appear.
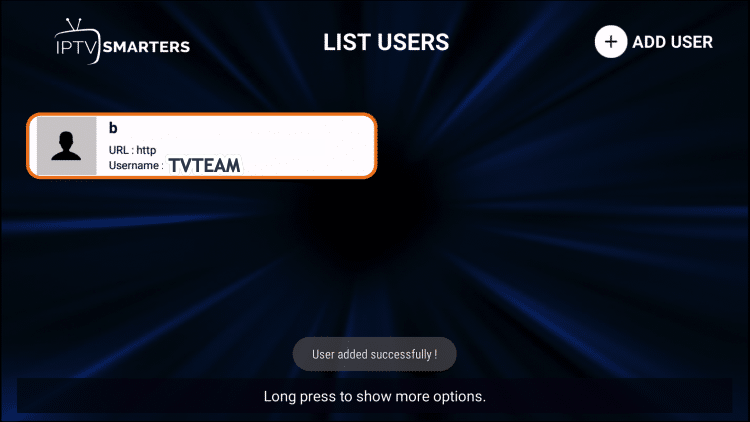
Click your Profile, and enjoy it!
Smart STB now has m3u playlist support
To use the app with m3u playlist, change the Portal URL to an m3u playlist and the app will load the playlist automatically.
Smart STB supports m3u and m3u8 playlist generated online for all TV's that can run the app. This feature is included at no extra cost for all subscribed users that have an active monthly or lifetime license.
Complete installation on Amazon Fire, most of the users use Perfect Player app. Below a short description of how to install Obtain both the M3U and EPG URLs provided by TV Team.
Install Perfect Player through the Amazon App store if using a Fire TV or Stick or through Google Play Store if using Android TV Box, tablet, or phone
Open Perfect Player and click the settings icon and then click General tab
Input both the M3U URL and EPG URL while replacing the x’s with your username and password
Exit to the home screen of Perfect Player and both channels and EPG should be populating
Refer to the video above for an in-depth explanation of various features
As we get a lot of complaints regarding the Perfect Player app on Amazon Fire, you may want to try to install Kodi. Here a short how-to;
1. Access your device settings
In the Settings menu, click Device. This is where you can control your app installation permissions.
2. Click on Developer Options.
It should be the second option on the list.
3. Enable Apps from Unknown Sources.
If this setting is off, click it once to turn it on.
WARNING: Allowing the installation of third-party apps can be a sizable security risk, as Amazon points out. In fact, Kodi installations on older Apple TVs were trivial to compromise. Installing Kodi on a Fire TV device involves a trade-off between security and convenience. Weigh your options carefully before installing.
There is also an outside possibility that installing third-party apps could cause your device to malfunction. If it does, simply factory-reset it and try a different installation. (If you're willing to take the risk again, that is.)
4. Acquire the Downloader app.
There are multiple ways to install Kodi, but the simplest way is with the free Downloader app. You can find it in the Amazon Appstore.
5. Direct Downloader to the Kodi website.
The best URL to use is http://www.kodi.tv/download, but you can use other sources if you prefer.
6. Select the Android app.
The Fire TV’s operating system is an Android branch, so the Kodi Android app will work just fine.
7. Choose the 32-bit installation.
In my experience, this version of the app works best with Fire TV devices, but you can try others if you want to experiment.
8. Click Install.
You can also use this screen to review Kodi’s permissions.
9. Customize Kodi to your liking.
You can access Kodi just as you would any other app on the Fire TV. From here, you can share your media libraries, install add-ons and otherwise tweak Kodi to fit your taste. Bear in mind that if you’re using a Fire TV Stick, you’ll probably have to use a remote media server, whereas the Fire TV has a port for USB storage.
In this guide, we will show you step by step guide to Install IPTV on Nvidia Shield TV. I will also share a list of best IPTV apps for the Nvidia shield. As the world of technology is growing day by day developers have now developed various tools to watch out their favorite shows online. The streaming services are not only the cheap one but also keeps you away from the headache of relying on cable network of dish TV for the same. One can now easily enjoy their favorite shows, movies, cartoon channels, sports, and news and much more anytime, anywhere you want. You really don’t need to stay stick to the fixed time schedule and no need to carry out those heavy TV sets along with you
The introduction of IPTV aka knows as Internet Protocol Television has changed the aspects of digital media services up to a greater extent. The combination of IPTV with Nvidia shield TV will take your streaming experience to the next level. Nvidia Shield is one of the leading android based digital media players that have made it quite easier to convert any of your non-smart LED TV into an Android TV. For enabling seamless access over a wide range of resources, one just needs to install IPTV on Nvidia Shield, that’s it.
How to Install IPTV on Nvidia Shield?
If you have all set to enjoy the world of free streaming with one of the finest IPTV resources here we are going to describe you the detailed installation process of IPTV on Nvidia Shield TV. As we have mentioned to you earlier that Nvidia Shield is an android based digital media player and hence the interested readers can easily install IPTV app on their devices from Google Play Store. To continue with the installation process, all you have to do is:
Before starting up with the installation process, you first need to turn on the Nvidia Shield. Tap to turn on it.
Launch Google Play Store from your device and then type IPTV Smarters pro in the search bar option.
Press the search icon to continue with the search process.
A list of various applications will be displayed on your search results. Just select the application with the developer name WHMCS SMARTERS.
Once over, tap on the install button to start the installation process of IPTV App
It will take a few seconds to complete the installation process, once done, click on open and use the IPTV Smarters Pro app on Nvidia Shield TV.
How to Use IPTV on Nvidia Shield TV?
Once you have done with the installation process of IPTV on Nvidia Shield TV successfully, the next challenge is to set up and use it on your device. IPTV and Nvidia Shield TV both come up with a very simple and interactive interface and hence one really doesn’t need to worry much about the usage and accessing of these apps on your device.
Once the app has been successfully installed on your device, launch the installed IPTV Smarters Pro app on Nvidia Shield TV.
Look for the Accept option and tap on it to get agree with the terms and conditions being provided by the app.
Now select the option of Add New User option from the list of provided ones and then selects Load Your Playlist or File / URL.
Wait for a few seconds to accomplish the process successfully and once done; next, you have to configure your IPTV service credentials for your device. There are basically two different methods you can follow:
If you’re Service Provider has sent you Playlist File then:
Select the File option you wanted to go further with.
Add a suitable name for your Playlist.
Once done, now launch your browser to get access to the playlist.
Search and select the playlist file that you recently have saved.
Once found, now tap on the option of Add User to go further with the process.
In case if you’re Service Provider sends you M3U URL then:
- Select the option of the M3U URL.
- Now, add a suitable name to your Playlist. (For Example – Sports Playlist)
- Enter the URL you recently have received from IPTV providers.
- Once done, now tap on the option of Add User.
- On the successful addition of User to your device, it will hardly take a few minutes to access a huge library of various IPTV channels basically associated with the IPTV provider on your device.
- Bingo! You have successfully done with the set up of IPTV on Nvidia Shield TV. You can now stream any of your favorite content only as per your preferences.
THIS ADD-ON IS ONLY FOR PEOPLE WHO HAVE THEIR OWN M3U LIST SO THEY CAN ADD IT TO THE IPTV CLIENT TO WATCH CHANNELS.
There are two guides below that cover devices running Jarvis & below plus Krypton & above.
How to Setup PVR IPTV Simple Client Kodi Jarvis:
Open Kodi
Select SYSTEM or SETTINGS depending on your skin
Select TV (or Live TV or PVR & Live TV if you are on a version lower than 15.2 and if you are then consider updating)
Select General
Select Enabled
You will now see a pop-up saying that you have no PVR Client enabled. Select OK
Scroll down and select PVR IPTV Simple Client
Select Enable
Select Configure
In General select M3U Play List URL
Add your M3U URL into the address section the one you'll get from TV Team
Select OK
Select OK again
Reboot Kodi
On your Home Screen, you should now see TV (or Live TV if on an older version of Kodi). Open that to see the live channel list
The list should look like this. Select a channel for it to load and play
The PVR Simple Client should now be set up with live tv streams available.
How to Setup PVR IPTV Simple Client Kodi Jarvis Krypton:
Open Kodi
Highlight TV
Select Enter add-on browser
Select PVR IPTV Simple Client
Select Configure
Select General
Location to Remote Path (Internet Address) Or paste in your M3U Play List URL from TV Team
Then Select M3U Play List URL
Enter the URL of your M3U Play List (you will get this from your TV Team) and select OK
If you have an M3U text file stored locally on your network/computer/box then set the Location to Local Path (include Local Network)
Then Select M3U Play List URL
Navigate to where the file is stored and select it
Select OK
Select Enable
Wait for channels to be loaded
Now when you go back to the Home Screen and select TV it should look like this
TiviMate is a streaming platform that allows a user to stream live content on his or her device. There are two versions of TiviMate one is free of cost, while the other is premium which costs a few bucks.

The only difference between these two versions is that premium allows you to stream live TV channels. Other than this, both versions are extremely smooth and come with a great user interface.
The IPTV player allows you to customize your own multiple playlists, select your favorite channels, and search for your desired channels. Although TiviMate does not provide TV sources so, for live TV, you ask permission from your local service provider.
It is always recommended to use a reliable VPN to ensure safe streaming from any third-party apps.

